
Best online selling solutions
Knowledge base for the
IdoBooking
Rate plans, cancellation policies and prepayments
In this article, you'll learn how to:
- create a rate plan with various prepayment and cancellation conditions,
- set up stay restrictions,
- enter prices and assign plans to dates.
To start the configuration, go to the OFFER > Rate plans tab in the IdoBooking administration panel.

Step 1: Define Rate Plans
Choose one of two options:
1. Edit an Existing Rate Plan
To modify an already existing rate plan, select it in the calendar and personalize all the settings, starting with defining its name, minimum reservation length and prepayment.
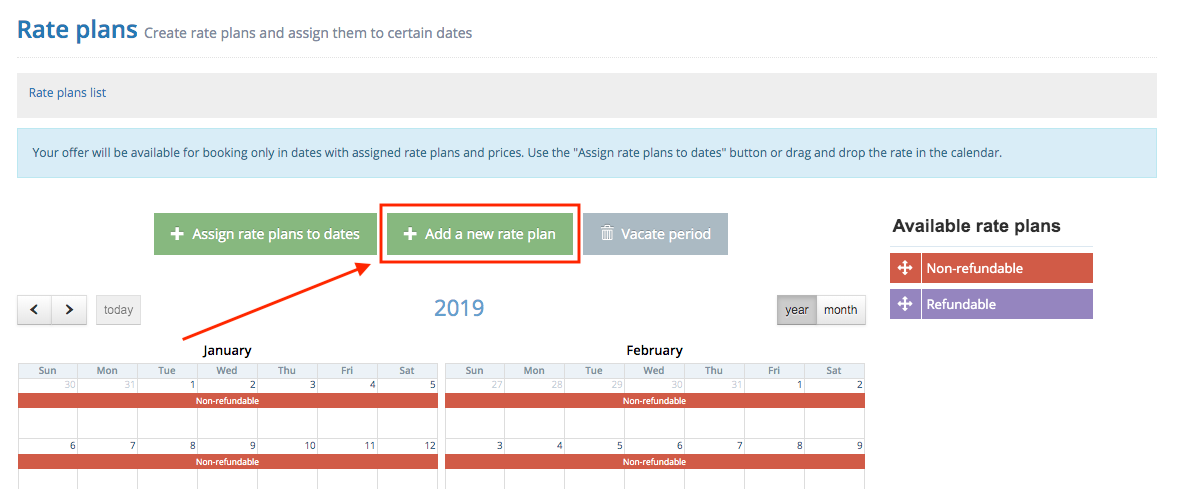
2. Create a New Rate Plan
Click on the “Add a new rate plan” button:

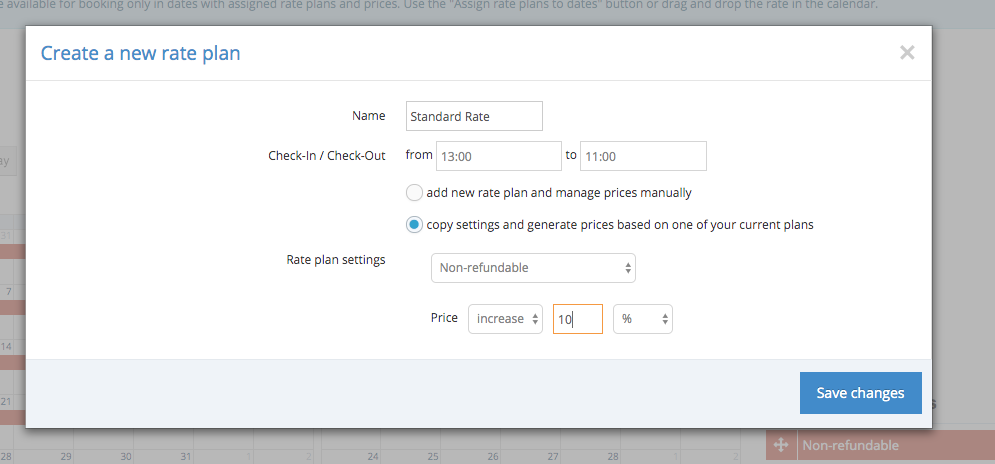
1. Name and basic settings
Choose a name (visible only internally) and specify the hotel day hours. Decide if you want to add a new rate and manage prices manually or copy settings and generate prices based on one of your current plans. If you decide to copy settings, length of the reservation, as well as prices in all currencies, including prepayments, are copied from an indicated rate plan and calculated according to chosen discount/mark-up. Changes in prices can only be made by editing the prices in the base plan. Other settings can be modified.
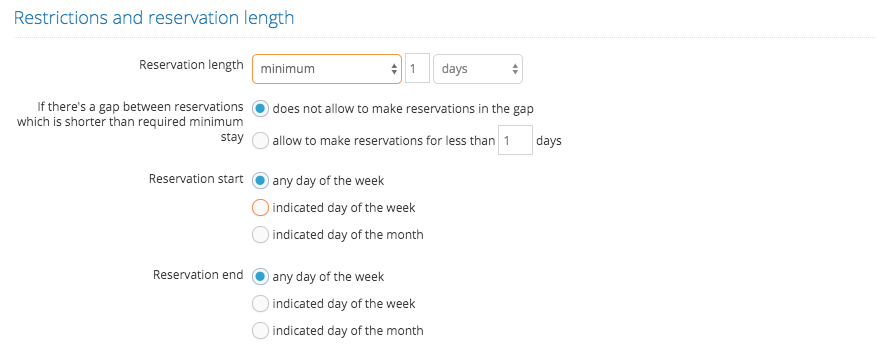
2. Length of reservation
Reservation length – Decide if you want to apply a specific reservation length. If you do, you have 4 options:
→ Specific - choose if you want to accept bookings only for some exact number of days,
→ Minimum - choose if you have a minimum stay requirement, i.e. accept bookings for at least 2 days. You can also choose to automatically fill in the gaps if they occur.
→ Multiplication - choose if you want to accept booking for an exact number of days but you allow to multiply it, i.e. accept bookings for a multiplication of 7 days (you can book a 1-week, 2-weeks, 3-weeks, 4-weeks, etc. stay)
→Reservation start/end – Decide if reservations may start and end any day of the week, or on an indicated day of the week/month.
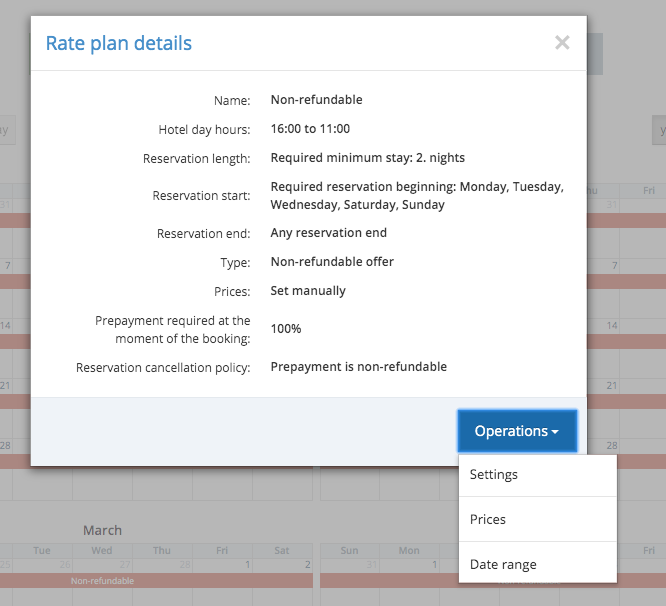
Step 2: Determine prepayment, cancellation and refund policy:
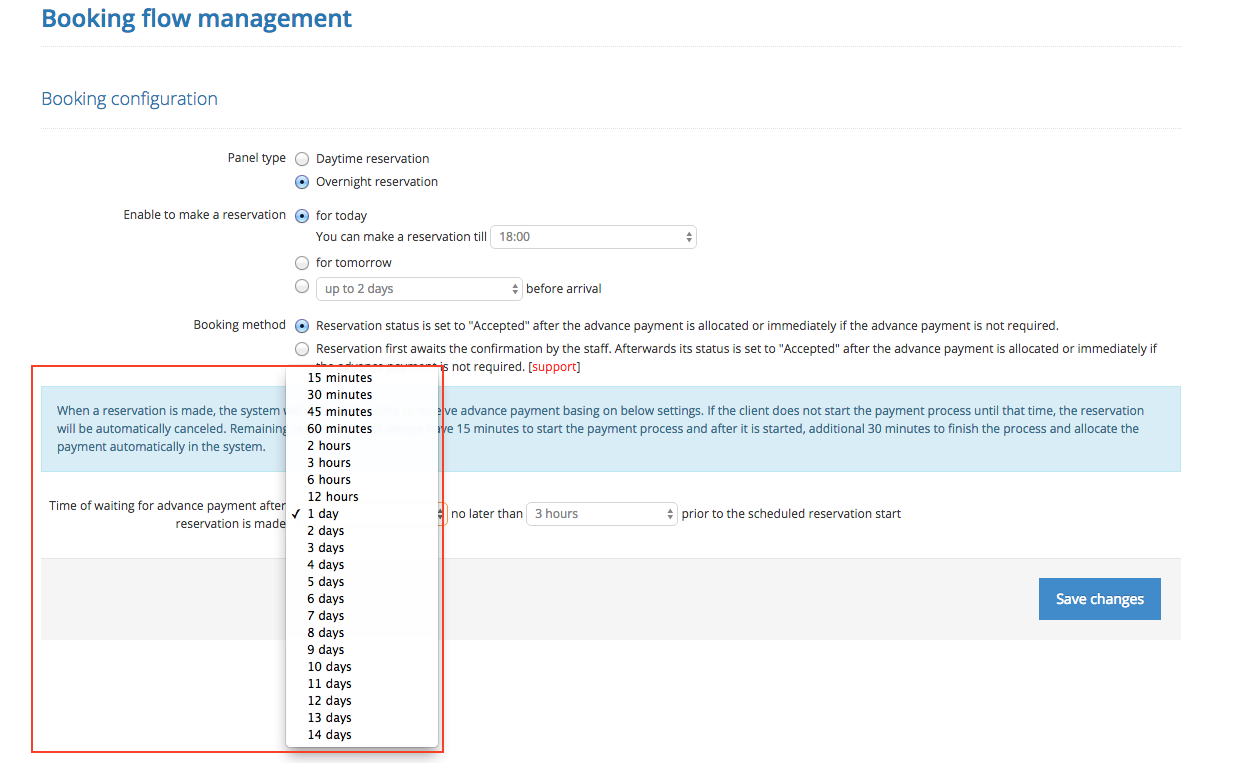
Determine if you require any prepayment (TIP: you can set up to 2 levels of prepayment, either for a certain percentage of the reservation value or a fixed amount). Please remember to set an appropriate time you give your customers to make a payment after placing the reservation. You can do it in the ADMINISTRATION/Booking flow management.
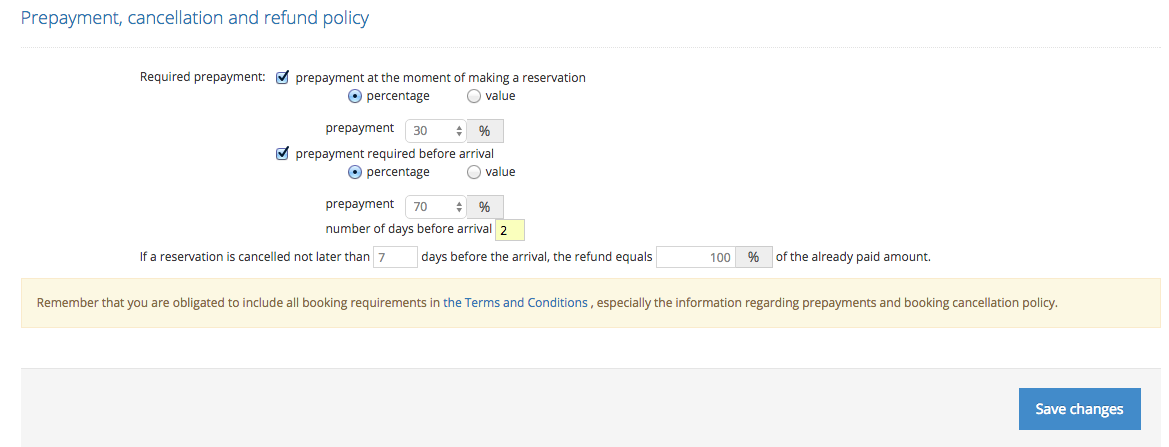
You can also specify your cancellation and refund policy. These conditions will be visible for clients while placing a reservation and on the reservation confirmation.
Step 3: Set Prices:
After creating the rate plan, choose it from the list of available plans and click on the Operations > Prices button.

IMPORTANT: By default, all newly created objects/rate plans are hidden and unavailable for booking. You need to uncheck the box in the “Hide in the given rate plan” column and fill in all rates. Offers with the price set to “0.00” will be also unavailable for booking.
You can set different rates for a week day, weekend, whole week and month. To determine which nights are charged at the weekend price, proceed to OFFER/Offer configuration:

All discounts and markups settings are available in the OFFER/Promotions, Markups and Discounts section.
Related content