
Best online selling solutions
Edu blog
IdoBooking
Photos of the accommodation facility that encourage customers to book: how to take them, what to focus on and what to avoid?
Did you know that 90% of the information received reaches us through graphics, 65% of the population are visualisers, and visual messages reach us faster than text? It is no secret that photos are a key element of accommodation ads. What and how to capture in the frame, how many pictures to include in the gallery and what are the 3 most important steps to successful photography? Check out our compendium and create photos of your facility that no one can ignore!

Why are photos so important?
- We are living in an image culture where visual elements work best and at the same time they are the fastest source of information: graphics are processed 60,000 times faster than other types of content!
- They are the best form of presentation of your facility or a virtual tour around it: they reflect its unique atmosphere and character, emphasize its distinguishing features, show its advantages.
- They evoke emotions, encourage reservations, attract attention and give a taste of what one can expect from their stay.
All these facts make photographs the simplest and at the same time the most effective form of advertising of your facility and building the image of your brand - that is why it is worth devoting enough time and attention to them. Right now is a good time to do that! Use the down time of your facility or limited operation of the tourism industry to refine the visual side of your ad in order to encourage guests after returning to the market with new, carefully prepared, eye-catching photos. How can you do that? Just follow these tips.
Photos should:
- be realistic: consistent with the actual appearance of the facility
- have high quality and resolution (minimum 2048 x 1080 pixels)
- be bright, clear, preferably taken in daylight
- show as much of the room as possible
- display room facilities, showcase their advantages and most important details, available amenities, characteristic design elements
What to photograph?
- facility: entrance and/or wider view of the building: 1-2 photos
- rooms: minimum 3 photos from different perspectives
- bathroom: 1 photo
- interesting, unique design elements: 2-3 photos
- view from the window: 1 photo
- balcony/terrace: 1 photo
- additional amenities: car park, swimming pool, kitchen, play area for children, etc.: 1 photo each
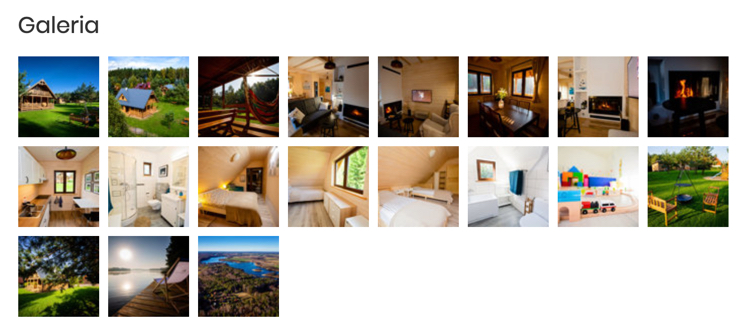
View of the gallery of one of our clients, Winiec.pl, offering year-round lodge rental:
You can also attach some photographs of the area or the most interesting attractions nearby. But try not to add too many pictures. The optimum number is 15-20 – more may discourage further viewing. If you are offering accommodation in e.g. holiday cottages or a guesthouse, put a photo of the facility first. In the case of apartments, the main photograph should be a picture of the room. Also remember about seasonality: If you also operate in the winter season or if you offer dedicated services for that period, add e.g. a photo of the snowy local landscape or a ski slope.
An interesting idea might be to put a gallery in the booking form. Screen from Lubinowe.pl:
How to prepare for taking pictures of the facility and rooms?
1. Tidy up the place: make sure there are no unnecessary items on any surface, all is clean and tidy. Vacuum the floor, wash the mirrors, turn off the TV. In the bathroom, clean the bathtub or shower, hide items such as toilet paper or the waste bin.
2. Open the curtains and take pictures in daylight, but not against the light. It is best to choose a sunny day for this and to take pictures when the sun isn’t shining directly through the windows.
3. Remember about details: put away laundry, make the beds, hide cables and other unsightly items. Provide some decorations, emphasizing the atmosphere of the interiors.
4. When taking photos outdoors, avoid capturing people or cars in the frame. However, if for example you want to show cars in the car park, remember to blur the license plates.
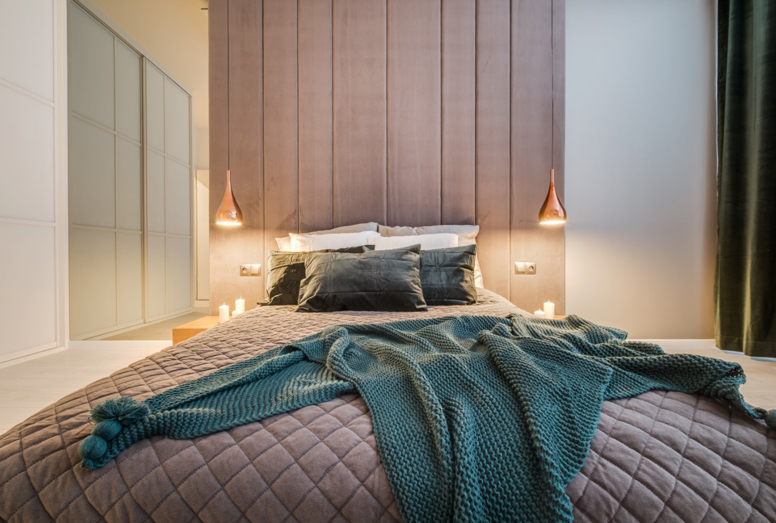
Would you like to create a warm, unique atmosphere in your picture? Accessories and decorations such as lit candles or elegant bedding can help you do that. Source: Tespis Apartments
Three steps to a successful photo
Composition
Plan your frame to highlight the most important elements while maintaining clarity and shape of the entire shot. Apply the rule of thirds while taking a photograph, based on which the most important items should be positioned at the intersection of lines dividing the frame into three. Both on the camera and on the phone you can activate a view with a special grid to help you do that. You can easily find more information on this subject on the Internet by typing “rule of thirds in photography” into Google. Try to take pictures from a corner of the room to capture them from the widest possible perspective. If possible, do not cut out too many items of equipment. Also don't leave a lot of blank space on either side of the frame.
Sharpness
Remember that the picture must be sharp and clear. In case of rooms, it is best to keep the same depth of focus throughout the picture, i.e. not to blur the background or elements that are a little further away from the item in the centre of the frame. In case of a building or surrounding area, you can experiment with depth, i.e. sharpen the foreground and blur the background. You can achieve this effect both with a camera and with a newer smartphone.
Editing
Most photos need to be processed, and sometimes they need to be cropped or otherwise edited. You don't have to be an expert in this area – all you have to do is slightly increase the contrast, emphasize the colour saturation or set higher/lower brightness. You can do it even with a simple application on your phone. But remember that the effect cannot be artificial.
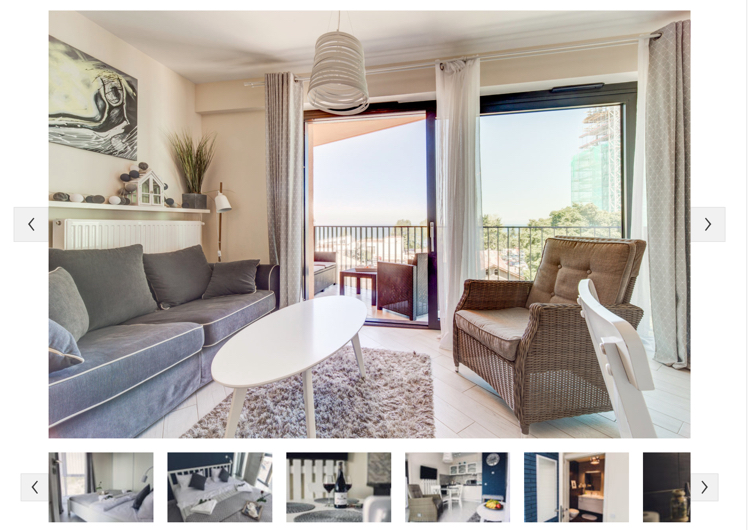
View of the gallery of one of our clients, seaviewapartamenty.pl, offering apartment rental:
What to avoid?
- dark, underexposed or overexposed photos
- photographs of guests
- mirror reflections of people
- fish eye effect
- capturing any data, certificates, etc. in the frame
Photos of the facility are almost the beginning of the journey. Customers “buy with their eyes” and remember visual messages much more easily, especially in the tourism industry. By providing correct, interesting, factual and at the same time eye-catching photographs, you significantly increase the chances of your ad being chosen and your place getting booked. So plan to refresh or refine the photos on your site now – by applying the above rules and taking example from the sample photos in this article, you can be sure to prepare them well and increase your sales potential!
Related content